The easiest thing to start online is a Blog. WordPress Blog to be precise.
But when starting out, you might need some pointers to create your WordPress blog and start blogging.
Bluehost is the #1 rated host on the web and used by millions of users worldwide.
It’s affordable, quality hosting provider and setting up WordPress on Bluehost hosting is very easy, As they provide WordPress support and have an inbuilt option to install WordPress on your server.
Since a few months ago, Bluehost has started providing very easy access to setting up WordPress on the system.
Right after you sign up for Bluehost, you get an option to set up WordPress and choose your theme right away, so you don’t have to find the settings to set up WordPress anymore.
Let’s get into it then!
Comprehensive Guide to Start a WordPress Blog on Bluehost
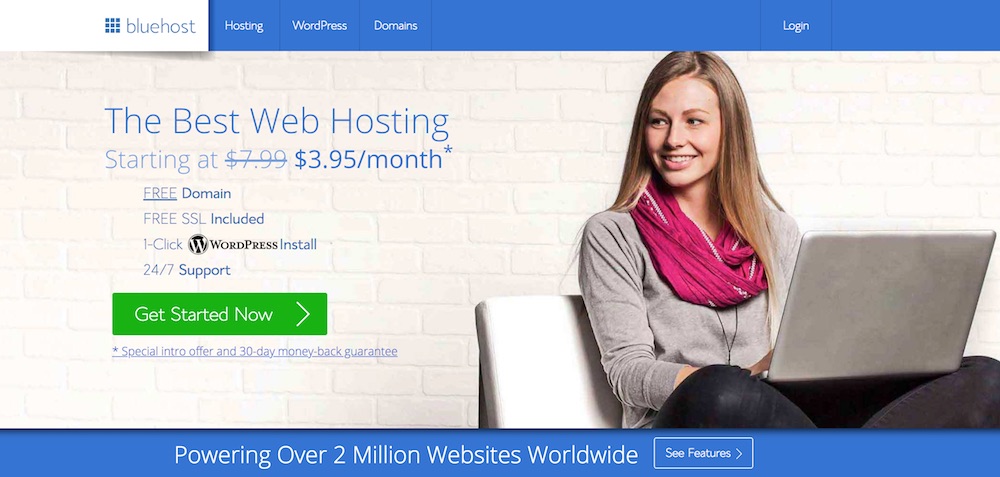
1: Visit Bluehost by Clicking this link to avail discount rates when signing up.
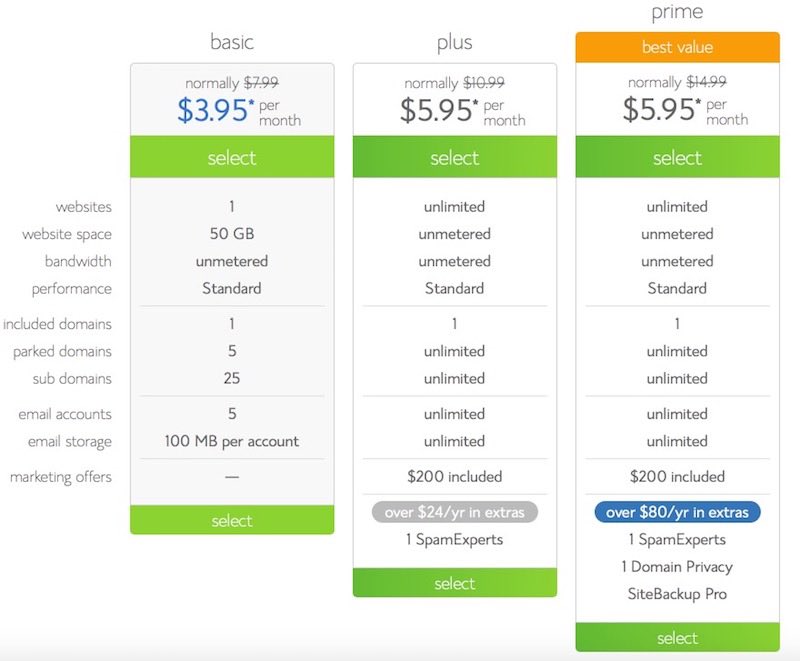
2: Choose Your Preferred Bluehost Plan
Choose your preferred Bluehost Plan out of the three you see. Different plans have different features and limits.
If you have confusion about which one to choose, check out our post on which Bluehost plan to choose to understand which plan will suit your needs.
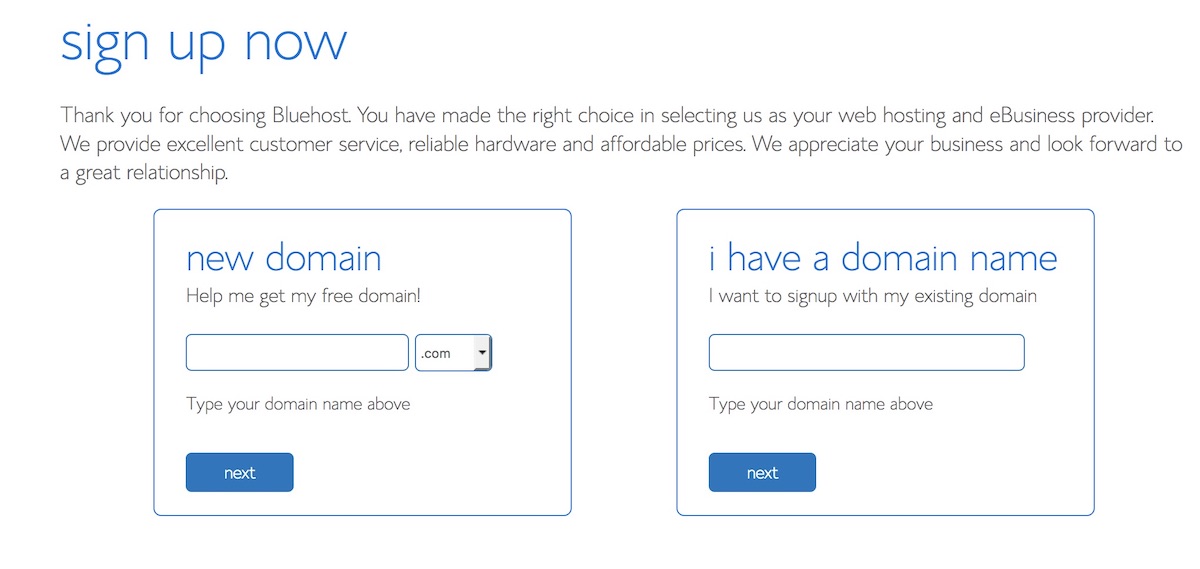
3: Choose a new domain or existing domain
Bluehost provides a free domain with all plans. So you can choose your choice of the domain name and register it for free when signing up for the hosting.
If you want to migrate your existing domain Bluehost, you can do that as well.
In the next step, choose your domain name and click next. Remember to choose a good domain name for your website.
4: Account and Billing Setup
In the next step, you have to create your account on Bluehost, choose your preferred hosting subscription duration and enter your payment details.
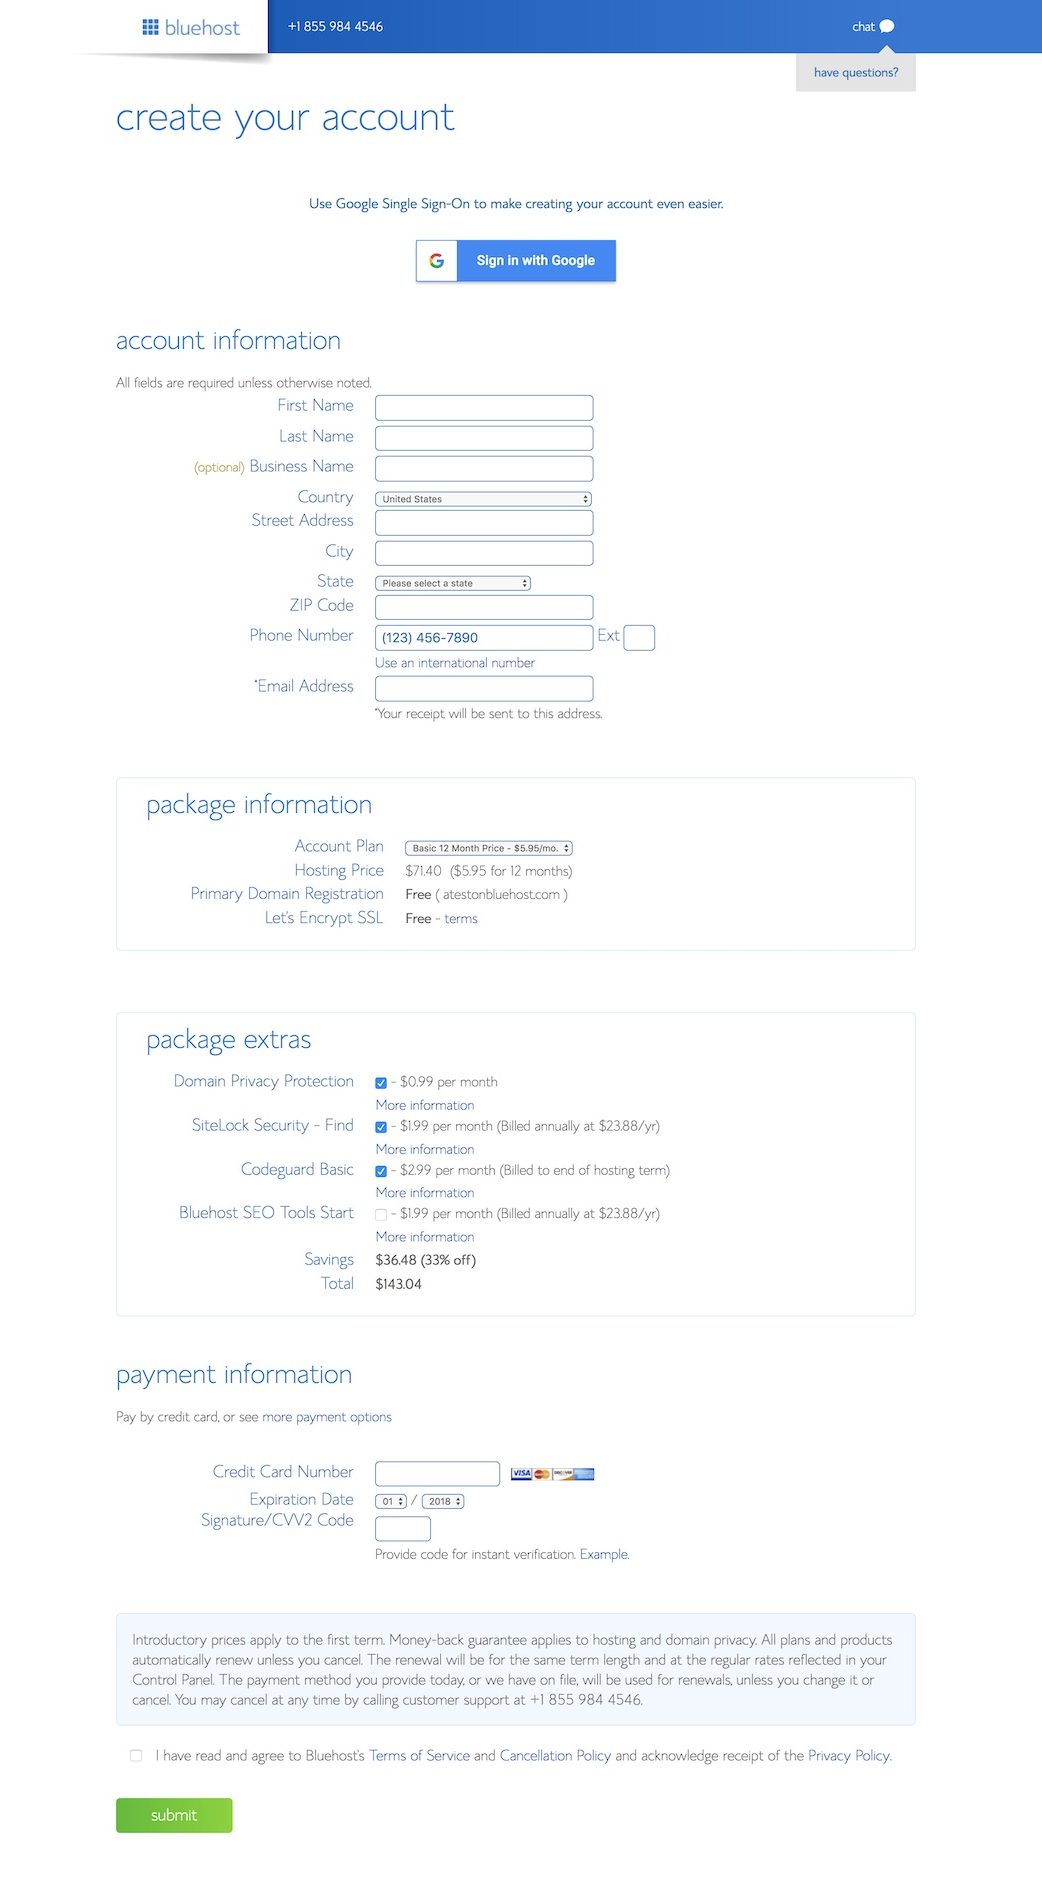
Bluehost subscription plans:
Bluehost doesn’t provide monthly subscription options. They provide subscription options of 12 months, 24 months, 36 months and 60 months.
The higher the duration you choose, the higher the discount.
So choose a higher duration for your subscription and you will receive a good discount, plus you won’t have to worry about renewing the subscription for a long time.
5: Choose a Password for your Bluehost account
Next, you will get the option to choose a password for your Bluehost account. Click on Create your password button and create a strong password for your account.

6: Install WordPress and Choose a theme for your site
Being a hosting that gives so much importance to WordPress, Bluehost automatically installs WordPress on new accounts when you sign up.
So you don’t have to waste time installing and setting up WordPress on your server.
As soon as you sign up, WordPress is automatically set up and Bluehost will show you the next window and ask you to choose a theme you want to install on your new blog.
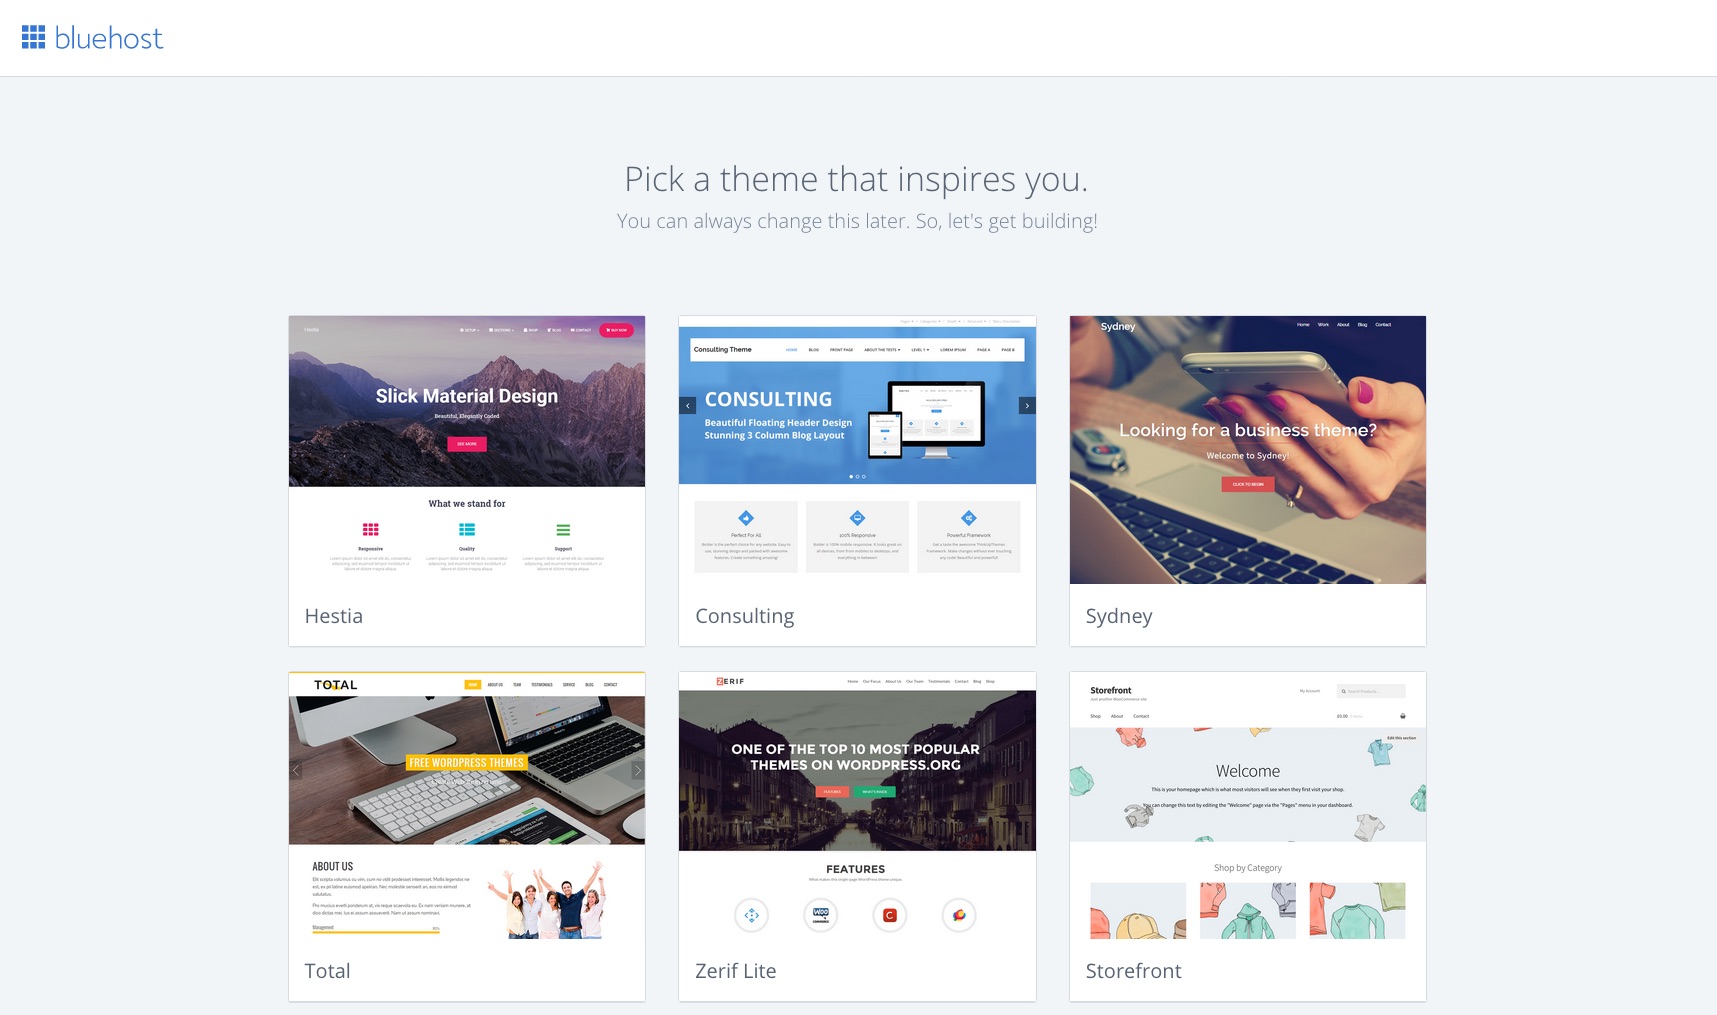
As soon as you select the theme, you’re all done. Your blog is ready with WordPress and a theme installed!
7: Start Building
After you select the theme, you’ll get this screen:

Click on the Start Building button to go to your WordPress admin panel. Which will look like this:
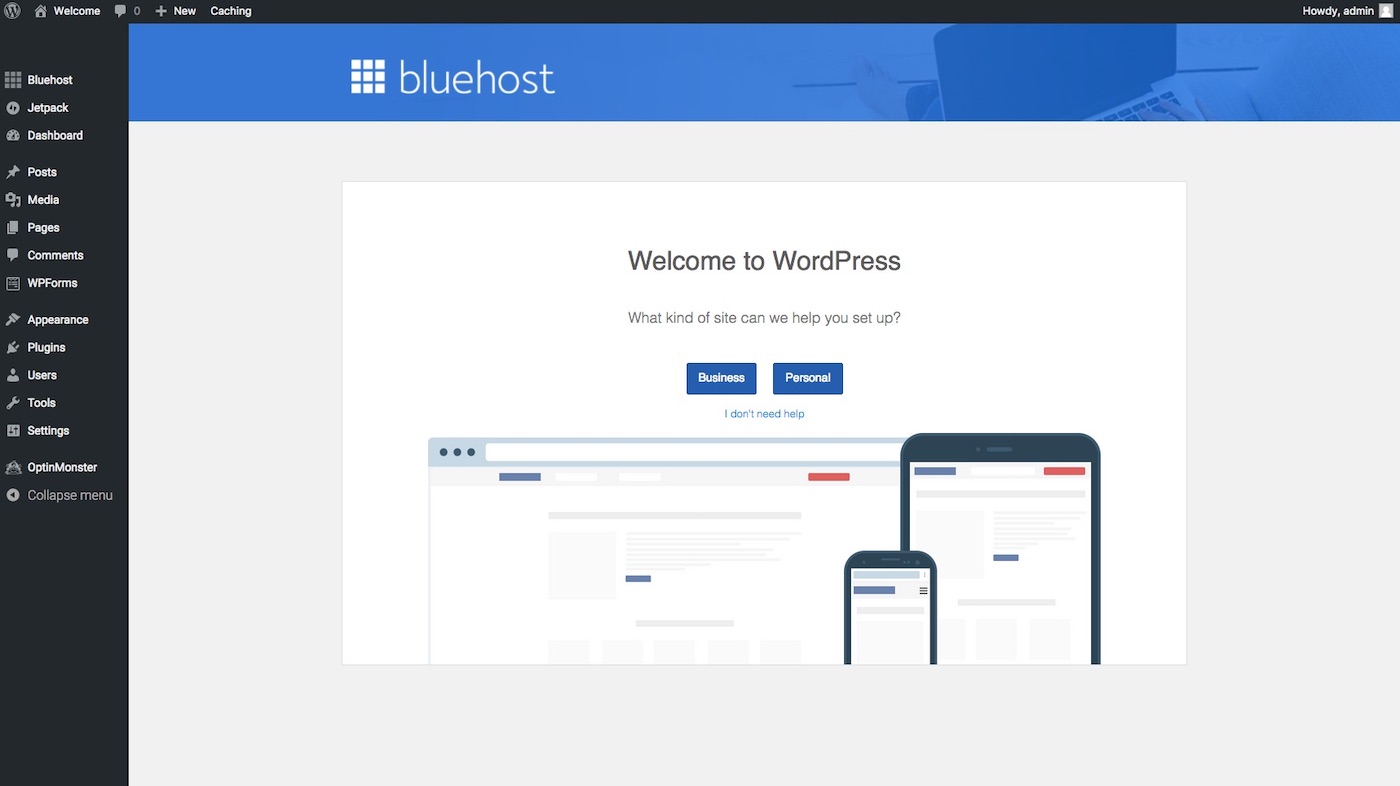
Bluehost has installed WordPress on your site and puts it on development so your blog will show coming soon page by default.
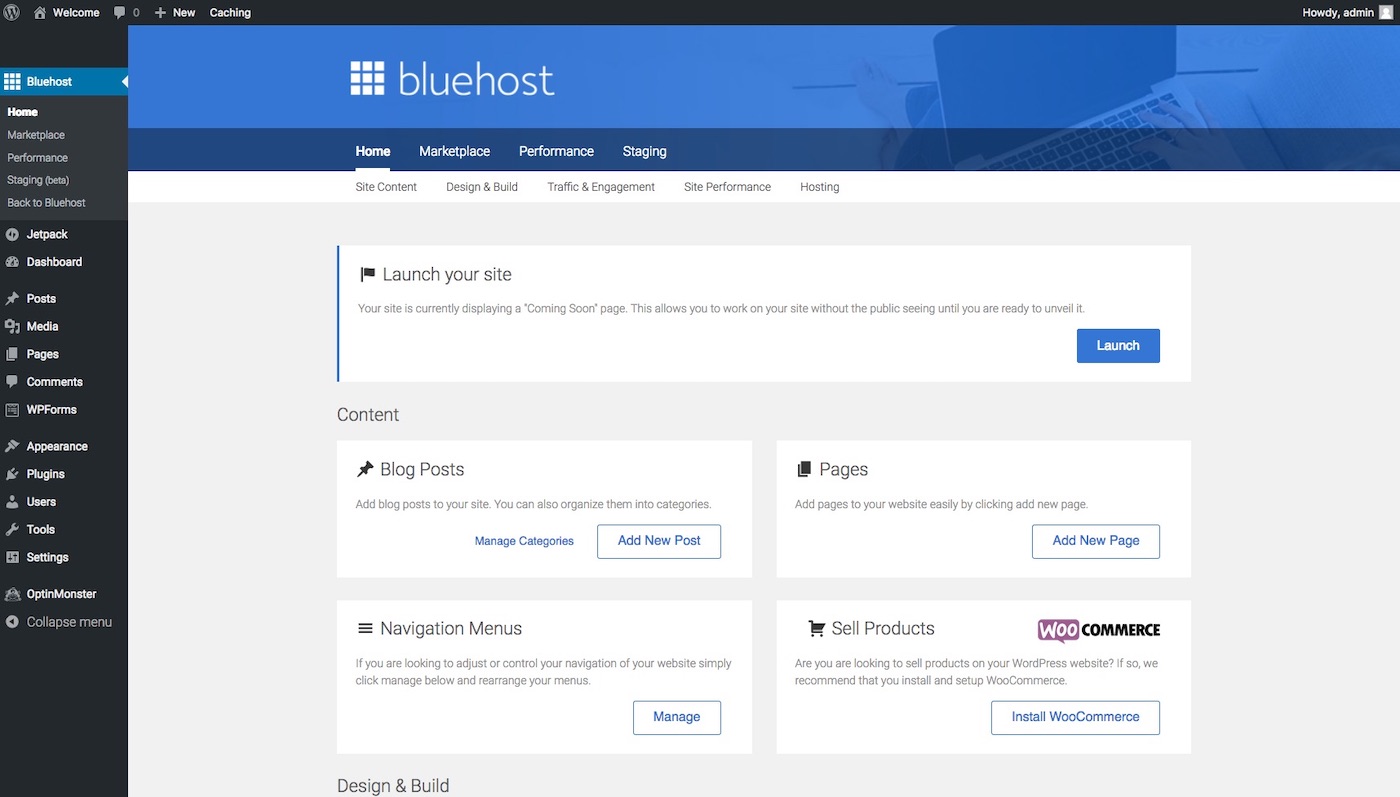
So click “Launch” in the WordPress dashboard and you’ll get the option to select site title and description as the image below:
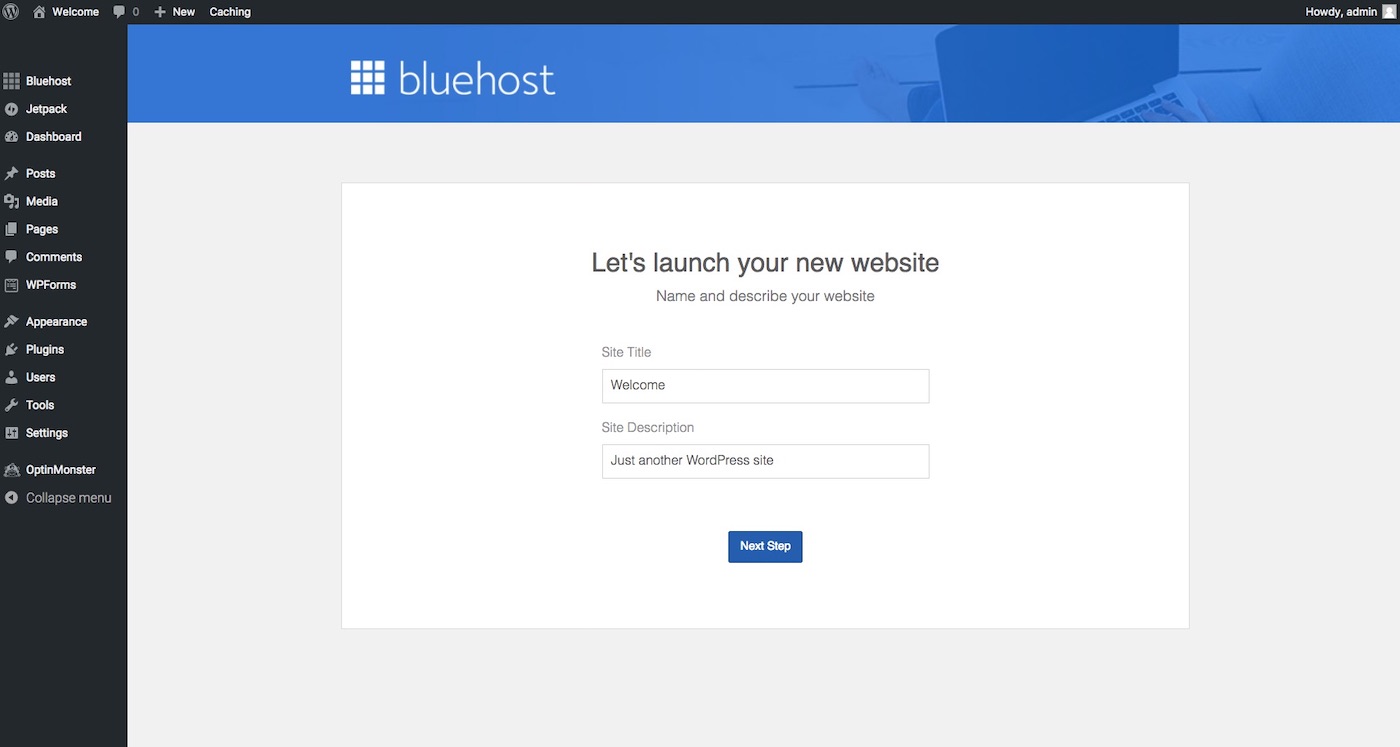
Select the title and description you want to use and click next. Your site will go live.
You can then start writing your blog and make any other changes you want to do on your site from there.
Starting a WordPress Blog, The Easiest Thing to Do!
See how quick it is? I mean, seriously, we’ve come a long way. 5 years ago, starting a WordPress blog was a daunting task for a newbie.
Now, anyone can start a WordPress blog in less than 3 minutes with Bluehost.
If you have any questions or need any help regarding setting up your WordPress blog on Bluehost, you can email me at any time at vinod@maherhackers.com or comment here.
What’s Next?: Learn How to Make Money Online Using Amazon Niche Sites

