Website loading speed is important. And cache plugins for WordPress help a great deal when trying to improve your website speed and SEO as well. One of the best cache plugins for WordPress is W3 Total Cache.
Here, I will provide a step to step guide on how to Install & Configure W3 Total Cache plugin to decrease your website loading time.
W3 Total Cache is a very advanced WordPress Cache Plugin and It is used by many big WordPress sites. Because it is a very advanced plugin, configuring it for new or even experienced users is a confusing task. So here is the guide to installing and configuring this plugin on your website.
Install W3 Total Cache on your WordPress
To install W3 Total Cache on your WordPress site, Go to add plugin page and Search for W3 Total Cache. Alternatively, You can download the plugin from here and upload it to your site via FTP.
After searching for the plugin, Click Install Now next to the plugin info tab.
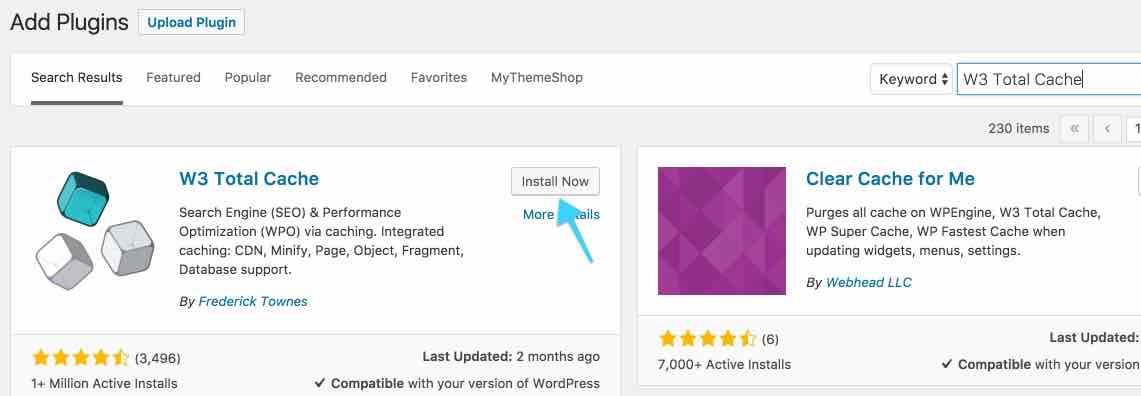
After installing the plugin, Activate the plugin and you’re all set!
How to Configure W3 Total Cache Plugin
Now that you have installed and activated the plugin, You are ready to configure it for the best results. I’ll show you everything step to step so you get the most out of the plugin.
Go to Performance on the WordPress menu for W3 Total Cache settings.
General Settings:
Go to general settings and activate the cache for everything you want to cache.
I enabled the following settings for my site, You can do the same: Page Cache, Database Cache, Object Cache and Browser Cache.
Here’s the quick image reference:
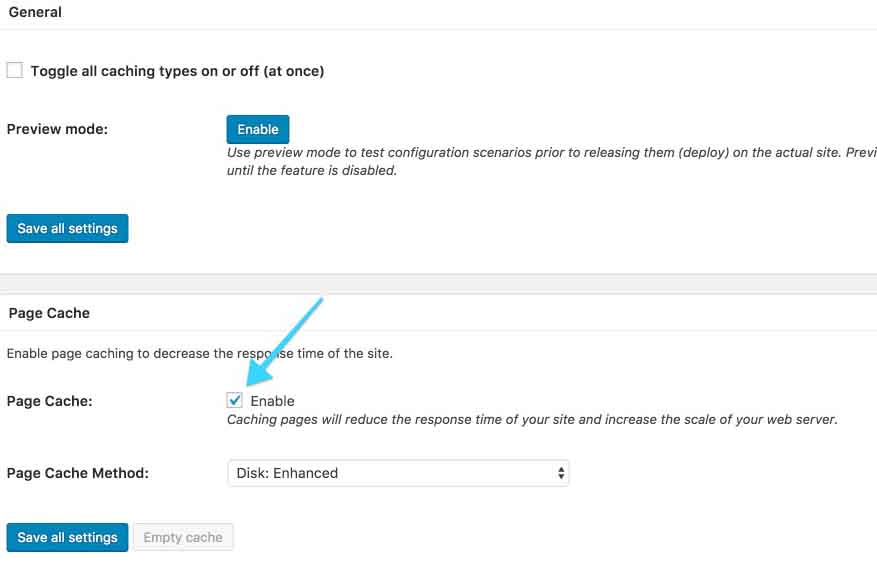
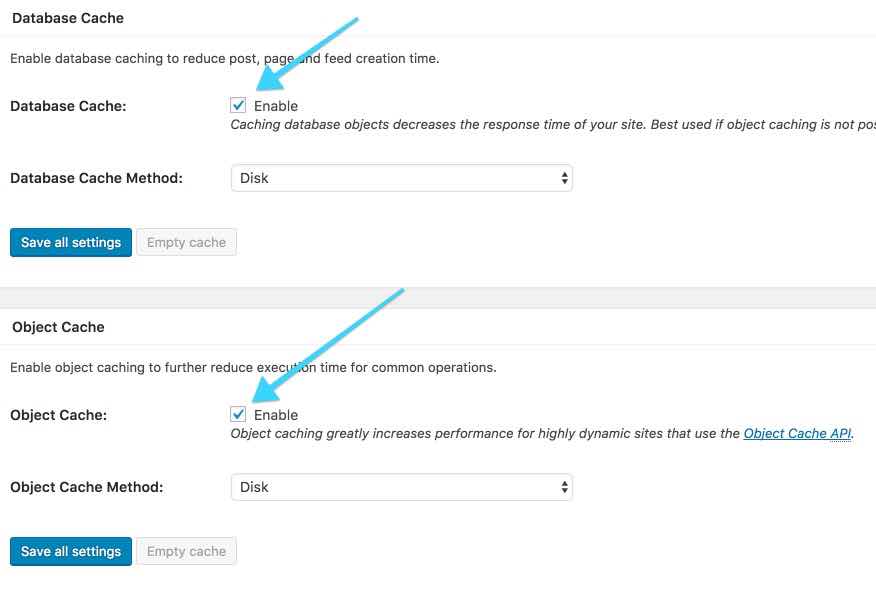
 After enabling the cache settings, Click Save all setting to save the current settings.
Now, It is time to go to each setting individually and make changes.
Page Cache:
Here on Page cache page, Enable the following:
- Cache feeds: site, categories, tags, comments
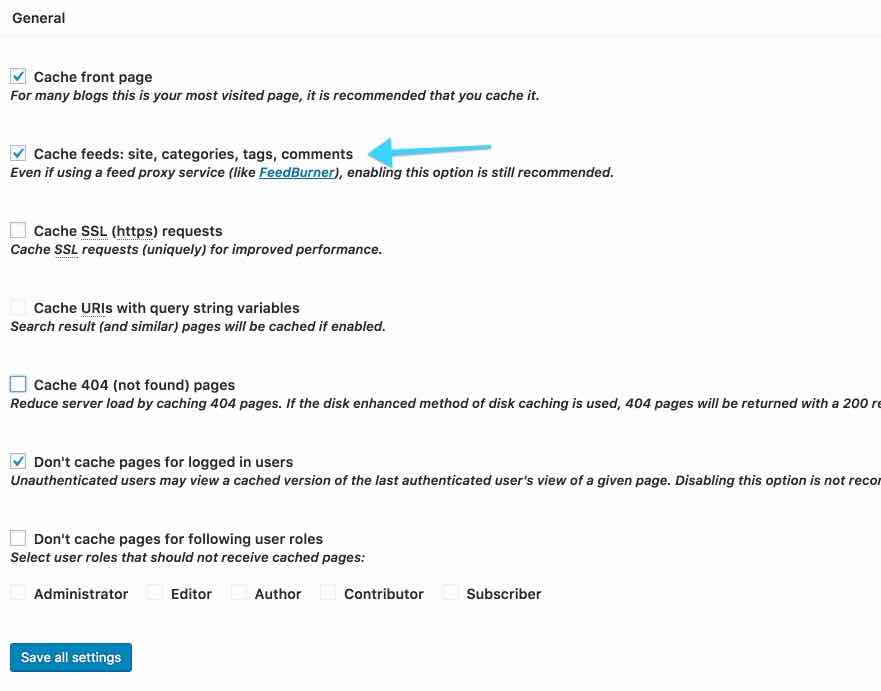
Leave everything else as it is.
Database Cache:
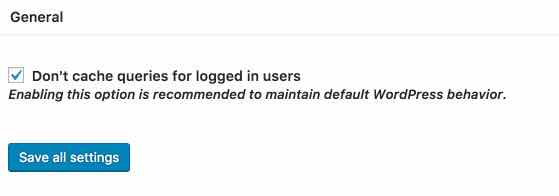
Nothing to do here. Just move on to the next settings.
There’s nothing to change on the Object cache page as well. So let’s move on to the Browser cache page.
Browser Cache:
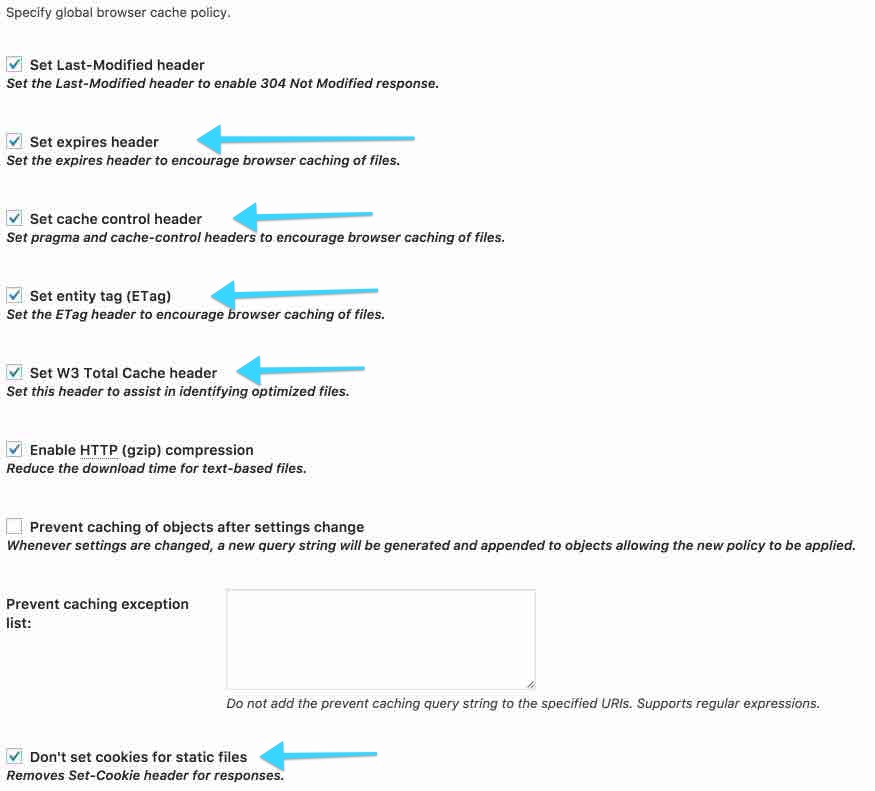
On Browser Cache Settings, Enable the following options which are disabled by default:
- Set expires header
- Set cache control header
- Set entity tag (ETag)
- Set W3 Total Cache header
- Don’t set cookies for static files
Minify Cache & Extensions
That does it. Now, One thing we haven’t enabled in Minify Cache. It’s because setting up Minify Cache is complex and you need to do some work for it to work properly. We have a separate post for that tutorial. Check out How to enable Minify Cache and Settings.
Also, W3 Total Cache offers extensions for other plugins like Yoast SEO, Cloudflare, Feedburner and some others.
You should enable those extensions based on which plugins you are using.
Also read:
- 10 Best Premium WordPress Themes for Your Blog
- How to Create a Google Adsense Account – Approval Guide
Before and After Pagespeed tests for MaherHackers
Here are the Google PageSpeed results for this website before and after activating the plugin and changing the settings as described above:
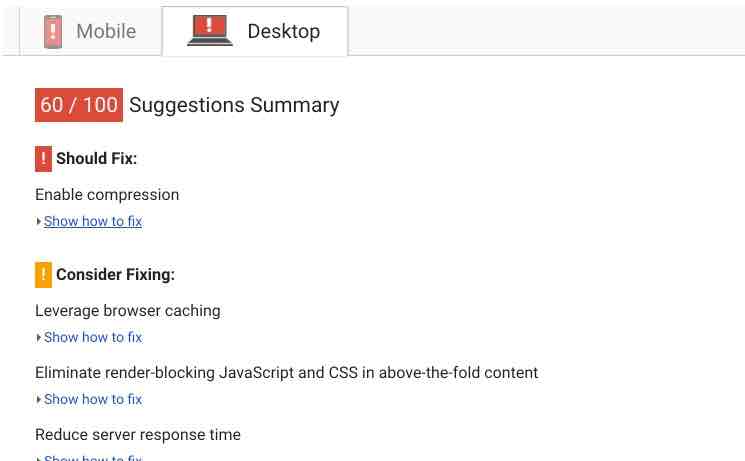
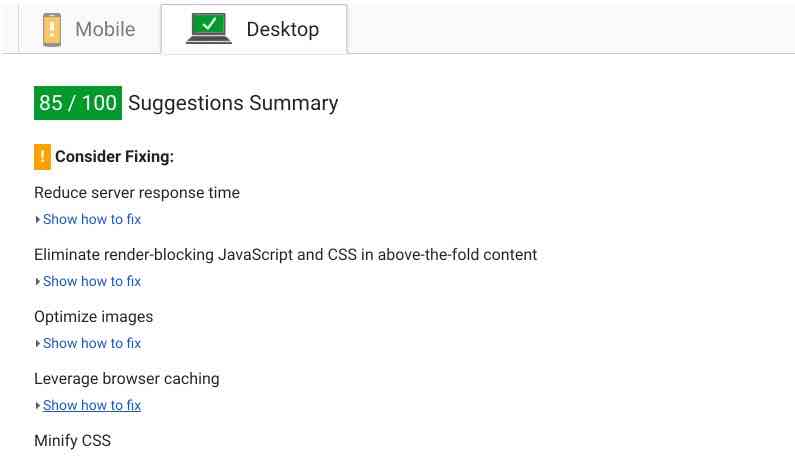
It is important to note that I have done exactly as the settings provided here and website speed has improved a lot. I have yet to enable Minify settings, which will further improve the loading speed of the site and Google PageSpeed results.
So that concludes our tutorial on How to Install and Configure W3 Total Cache plugin on your WordPress site. Did using this plugin improve your website loading time? Share your experience in the comments.

